I've always enjoyed using photo corners. Not your traditional photo corner - remember the black ones we used to secure our photos in the old style scrap books? I like something more decorative. In the mini books I've been making lately, I have been using some photo corners, but I worry that they just didn't give enough room for a photo to fit in. While working on the mini books of late, I came up with a way to make my own photo corners. I'm sure the idea is not so original, but here is a photo tutorial on how I make these corners.
For your supplies, you'll need cardstock, a border punch (you could also use decorative scissors (I'm sure you have some of those around!) a pair of scissors and your Scor Pal (or other method you may use for scoring)

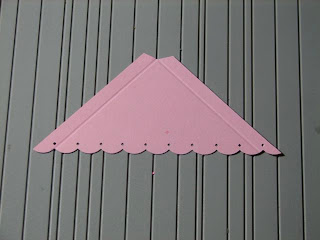
For two equally sized triangles, cut a square of cardstock in half diagonally. Whatever the size you want for your corner, add 1/4". This will give you enough room for the border punch and the fold over edges.


Use your border punch on the long side of the triangle.


Make score lines 1/4" from the edge of the two long sides of the triangle.


Cut a small "V" shape off the corner of the triangle. This eliminates the corner so that the paper doesn't bunch up when the edges are folded under.

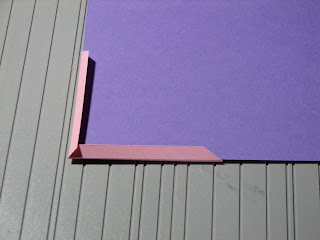
This is what it looks like on the back side of the corner.


This is how it fits on the corner of the photo mat, on the back side of the mat, and this is where it is glued down.

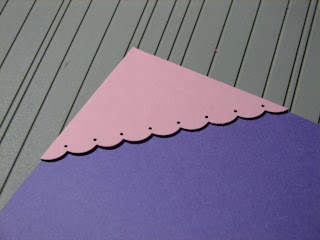
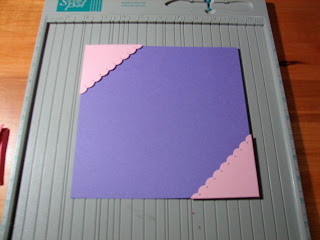
And this is how it looks on the front side. Having the edges wrap around the corner of the photo mat, it gives plenty of room for the photo to slip right in.
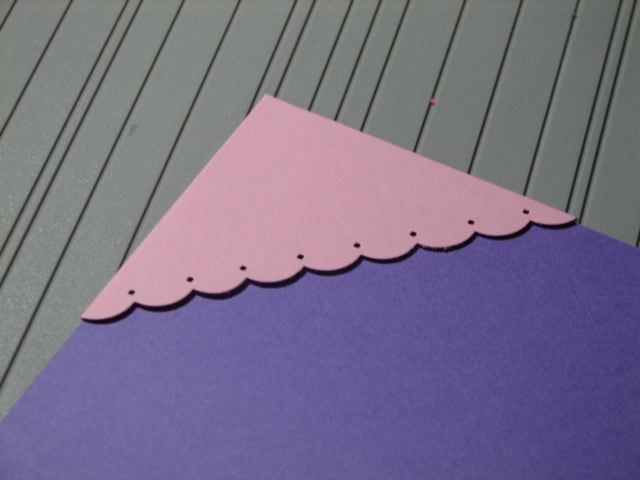
Two more views of photo corners.

I hope this little tutorial will help in making your own photo corners. I love putting them in my scrapbook layouts and mini books.


I hope this little tutorial will help in making your own photo corners. I love putting them in my scrapbook layouts and mini books.
Thanks for stopping by.
Koala-t hugs,
Cathy
This is such a great idea!!! Thanks for the tutorial.
ReplyDeleteCathy,
ReplyDeleteThanks this is so helpful!! I love your blog and your mini's are awesome!!
Thanks for sharing,
Candi
Those are wonderful. TFS
ReplyDeleteFabulous idea! Thank you for sharing, now I have another use for my border punches!
ReplyDeleteTotally awesome! TFS I will use this technique. I am off to check out more of your projects...
ReplyDelete