Saturday, March 27, 2010

Sweet Baby Girl Book

As promised, here is the baby book I did for a girl. The paper is from K & Co. Itsy Bitsy Stack. It measures 8 1/2 x 8 1/2 and makes a nice sized book. The thickness of the book was larger than I expected and I used 2" cable rings (made by 7 Gypsies Co.)

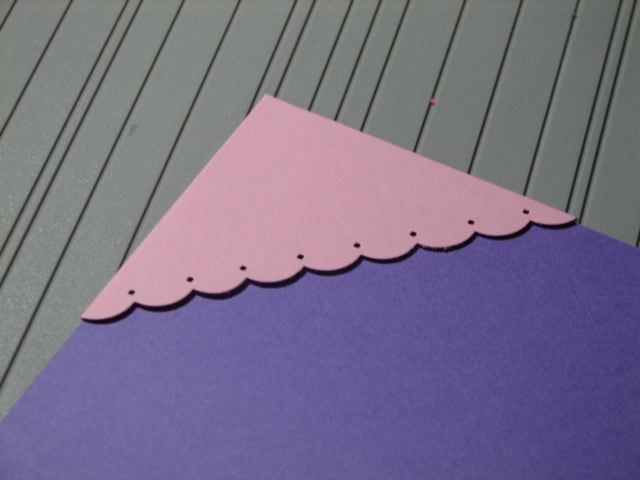
The cover was made using Martha Stewart Punch Around the Page Daisy punch set. I did the largest one 8 1/2" x 8 1/2"..the next one was cut 6 3/4" x 6 3/4" and the title mat was cut at 5" square and just punched the corners. Title was cut using All Mixed Up cartridge and my Gypsy, cut on the Cricut.


Sugar and Spice title was cut using the Gazelle. One tag has printed a place for baby stats (birthdate, weight, length, etc)

I used ribbons, borders and corners to make the photo insertion simpler for the person using the book. And I like the look it gives the pages.


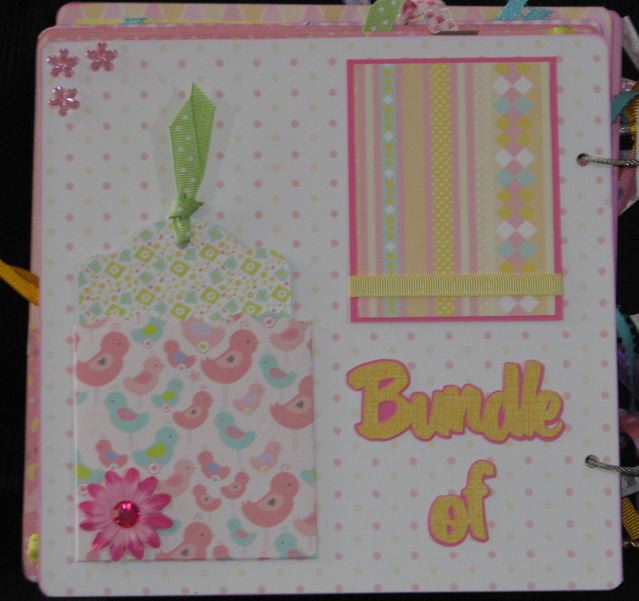
The title for this page was also cut using the Gazelle. Its a photo mat that has a pocket with a tag for another photo and journalling. LOTS of room for all sorts of whatever can be added!

I used the same Martha Stewart border punch on this page too...but using two strips of cardstock to form a pocket to hold the tags.


I love the papers of this stack. So many different colors and prints and yet they are all coordinated (which is something I have trouble doing..so using an entire stack is great because I know it all "goes together!" I enjoyed using border punches throughout the book!

One of my favorite border punches and the way I used it, it looks like it is punched all the way around the page. Its EK Success slim line punch Scrolls. I also made the photo corners for this page (see my blog post for March 24 for the tutorial)


I used the Basic Grey magnets to hold this folder closed. I LOVE those magnets. The Bling butterfly is from Recollections brand from Michael's.

This is the above folder, but shown open.


I'm gearing up for a new batch of mini books. AND I would like to add that I have been selected as a Design Team member for the Cricut Mini Books blog. I'm a bit nervous, but excited about being a part of this new blog. I've got several ideas whirring around in my brain!

Thanks for stopping by. Have a great weekend.

Koala-t hugs,

Cathy


Wednesday, March 24, 2010

Make your own Photo Corners-A Tutorial

I've always enjoyed using photo corners. Not your traditional photo corner - remember the black ones we used to secure our photos in the old style scrap books? I like something more decorative. In the mini books I've been making lately, I have been using some photo corners, but I worry that they just didn't give enough room for a photo to fit in. While working on the mini books of late, I came up with a way to make my own photo corners. I'm sure the idea is not so original, but here is a photo tutorial on how I make these corners.


For your supplies, you'll need cardstock, a border punch (you could also use decorative scissors (I'm sure you have some of those around!) a pair of scissors and your Scor Pal (or other method you may use for scoring)


For two equally sized triangles, cut a square of cardstock in half diagonally. Whatever the size you want for your corner, add 1/4". This will give you enough room for the border punch and the fold over edges.

Use your border punch on the long side of the triangle.

Make score lines 1/4" from the edge of the two long sides of the triangle.

Cut a small "V" shape off the corner of the triangle. This eliminates the corner so that the paper doesn't bunch up when the edges are folded under.

This is what it looks like on the back side of the corner.

This is how it fits on the corner of the photo mat, on the back side of the mat, and this is where it is glued down.

And this is how it looks on the front side. Having the edges wrap around the corner of the photo mat, it gives plenty of room for the photo to slip right in.

Two more views of photo corners.


I hope this little tutorial will help in making your own photo corners. I love putting them in my scrapbook layouts and mini books.

Thanks for stopping by.

Koala-t hugs,

Cathy


Bundle of Joy Baby Book

Well, the weekend craft fair is over and its back to normal (well, whatever 'normal' is =~D ) It was long and exhausting and very disappointing. We made no sales on Saturday and only 2 on Sunday, not even making $20.00. My daughter and I were feeling quite dejected, but decided onward and upward! We are brainstorming to come up with other ideas to sell our work.

Until then, here is another book I made. I'm really happy with this book (and there is another I made in pinks for a girl which I will post tomorrow). The paper is from K & Co. and its called Itsy Bitsy. Its for a baby boy book and I was surprised the size of the paper is 8 1/2 x 8 1/2", so instead of cutting down the paper, I cut the chipboard to fit. That made it so much easier to make the pages.

For the cover, I used EK Success border punch for the papers, and cut the title using the Gazelle.


One of the tags for this page has a place for the baby info - name, date of birth, weight, etc. I used a pen in the Gazelle and it "drew" the words instead of cutting them.

I've been making my own photo corners (which I will do a mini tutorial of in a future post) and used them for this photo (and a few other pages in the book.


This title was cut using the Cricut and All Mixed Up cartridge.


This has a space for a photo and two tags for more photos or journalling.


This page has a flap, with a magnet closure, with more room for photos on the inside.


I did realize with all the books I've been making, that they all have lots of pages! I guess I like lots of pictures, so I make books that will hold lots of pictures!

Thanks for stopping by...hope you enjoyed today's feature.

Koala-t hugs,

Cathy

Friday, March 19, 2010

My First Attempt with Glass Blocks

I've been wanting to try these blocks for a long time. I had one sitting on my desk waiting for me to do something with it for weeks. I finally gave it a try this week.

I designed this in the Gypsy, and cut from vinyl. The moon is from A Child's Year and the font for Sweet Dreams is Jasmine. I used a string of 30 mini lights with white wire and a pink ribbon around the block.


This is what it looks like when lit up.


This one is the same but in blue. I didn't put a bow on it (too girly?) and used a different bulb in it. I like this one because it has a thumb wheel to turn it on and off.

These will be shown at the craft fair this weekend.

Thanks for stopping by! Have a great Friday.

Koala-t hugs,

Cathy


Thursday, March 18, 2010

Thinking of Spring

This weekend is our first craft fair of the year. My daughter and I have been doing craft fairs for several years now. She really enjoys them. I enjoy the time we spend together.

Katie has been knitting items to sell but this year, she thought she would try her hand at clay sculpting. She created these vases, adding clay to glass. She asked if I would make some paper flowers to put in the vases.

Here are a few of our collaborative efforts! Hope you enjoy.


Thanks for stopping by. Have a great day!

Koala-t hugs,

Cathy

Sunday, March 14, 2010

Getting Tired of Seeing Mini Books Yet?

I hope not! Since the last week of January I have completed 9 books and will finish the 10th one this week! Next weekend is the big 2 day craft fair and I'm looking forward to showing the new books.

The feature for today is something different for me. I used tags in the past few books, but this one has a tag for each page! I had lots of fun with this mini!

The paper is from Hobby Lobby's brand Paper Studio and the stack is called Ooops a Daisy. Its got a unique color combination and a bit of a change for me from the usual bright colors.

The shape was cut using my Gypsy and the marquee shape from Accent Essentials with a rectangle from the George cartridge to make one of the sides of the marquee straight (better for binding the book.) I used binder rings to assemble the book.

Even though each page has a tag and pocket, I tried to create a little variety. This page, the tag is side loaded, and I used a flower from the paper for the pull tab.

This pocket has a window, so placing a photo on the tag, it will be seen through the pocket. I used transparancies for the windows.

This pocket was created with a half circle.

I also enjoy using border punches to edge the pocket edges.

Another variation, cutting the pocket on an angle.


This isn't really a pocket, but a border where the tag slips inside of it. A great edge for the photo to be placed on the tag


Hope you enjoyed today's feature. Another busy week ahead, gathering all I'll be taking to the craft fair. I'm looking forward to showing some new creations. Here's hoping its a nice day weatherwise and folks come in to shop!

Have a great Monday!

Koala-t hugs,

Cathy