Sunday, July 22, 2012

Dance Mini Album

Hi Folks!  Hope you are having an enjoyable weekend.  I finally got some pics of my latest creation and wanted to share.

I've had this book in various stages on my desk for possibly 3 months.  I was either interrupted with sewing projects or I just didn't know how to finish it.  But I made the decision it had to be completed and here is the finished product.

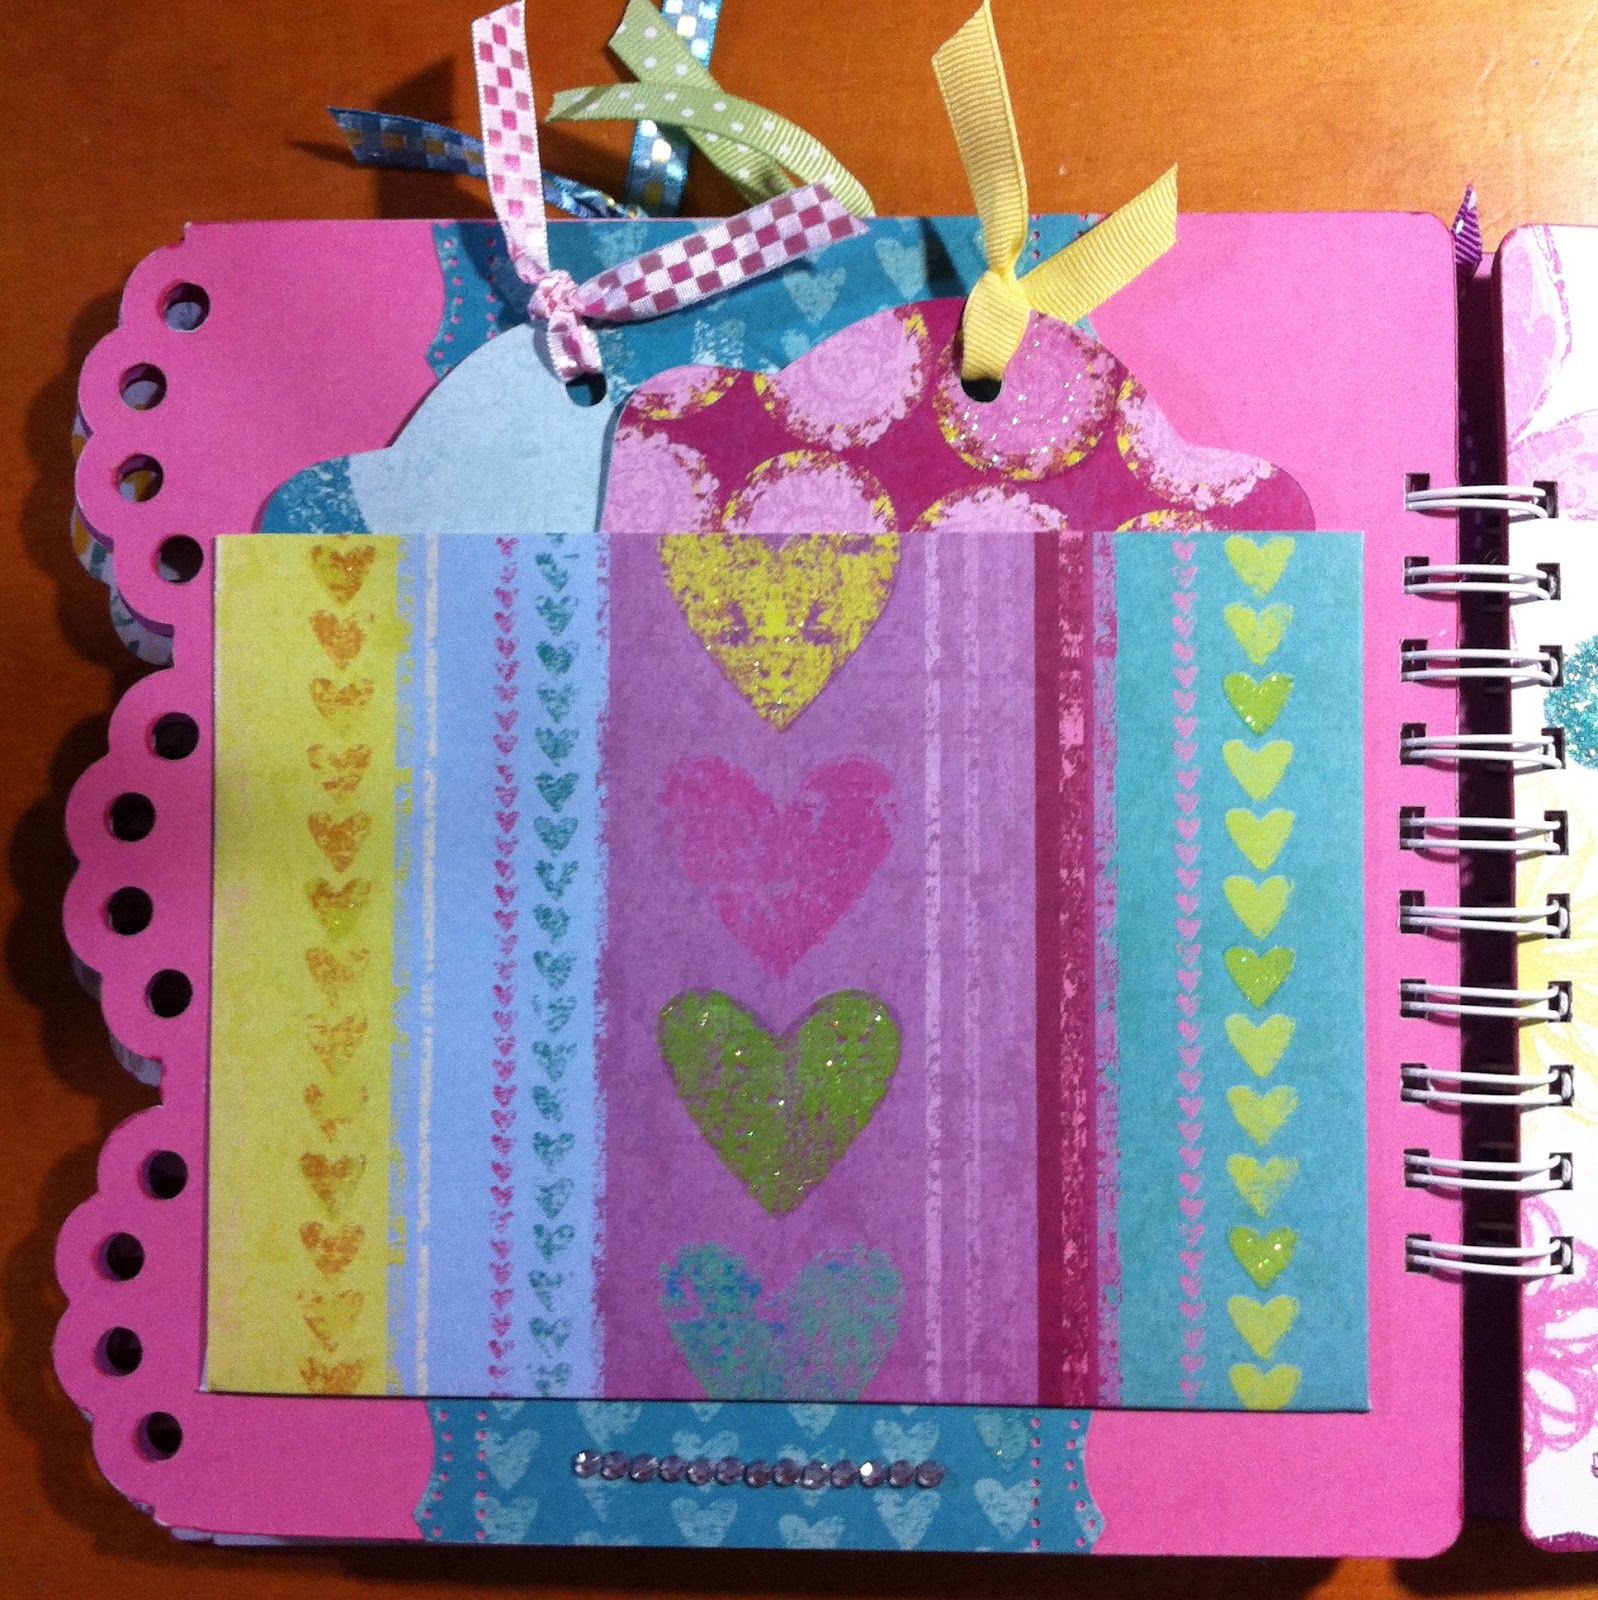
I cut the pages using my Cricut and Gypsy.  I created the scalloped page (approximately 8 x 11 in size) using a scalloped edge and rectangle welded together.  Then I used cardstock and DCWV adhesive backed fabric paper for the pages.  Now, I thought the fabric paper would be easy to use.  Not so much.  In the future when I use this paper, I will use even edges so I can wrap the fabric/paper around the edges so I don't have to worry about little fuzzy edges.  I had to trim little threads around the edges of these pages to make them look clean.

 For the cover, I used the Twinkle Toes Cartridge for the stage setting.   I"m not completely pleased with the cover design.  It needs something.  I plan to make another, using a flocked paper for the drapes.   The dancers were cut in silhouette using Shall We Dance cartridge.  If you see a slight glare on the first photo, its not your eyes. I used a sheet of clear acrylic to cover the cuts on the front of this book.  This way it will protect the images and shapes after continued handling of the book.


I used the spotlight and phrase also from the Twinkle Toes cartridge.  Paper by Bazzill Bling and Coordinations.

I like to add lots of space for the owner of the book to add lots of photos.  This one, the pocket can hold a 5 x 7 and the tags inside each old a 4 x 6 and 3 wallet sized photos.


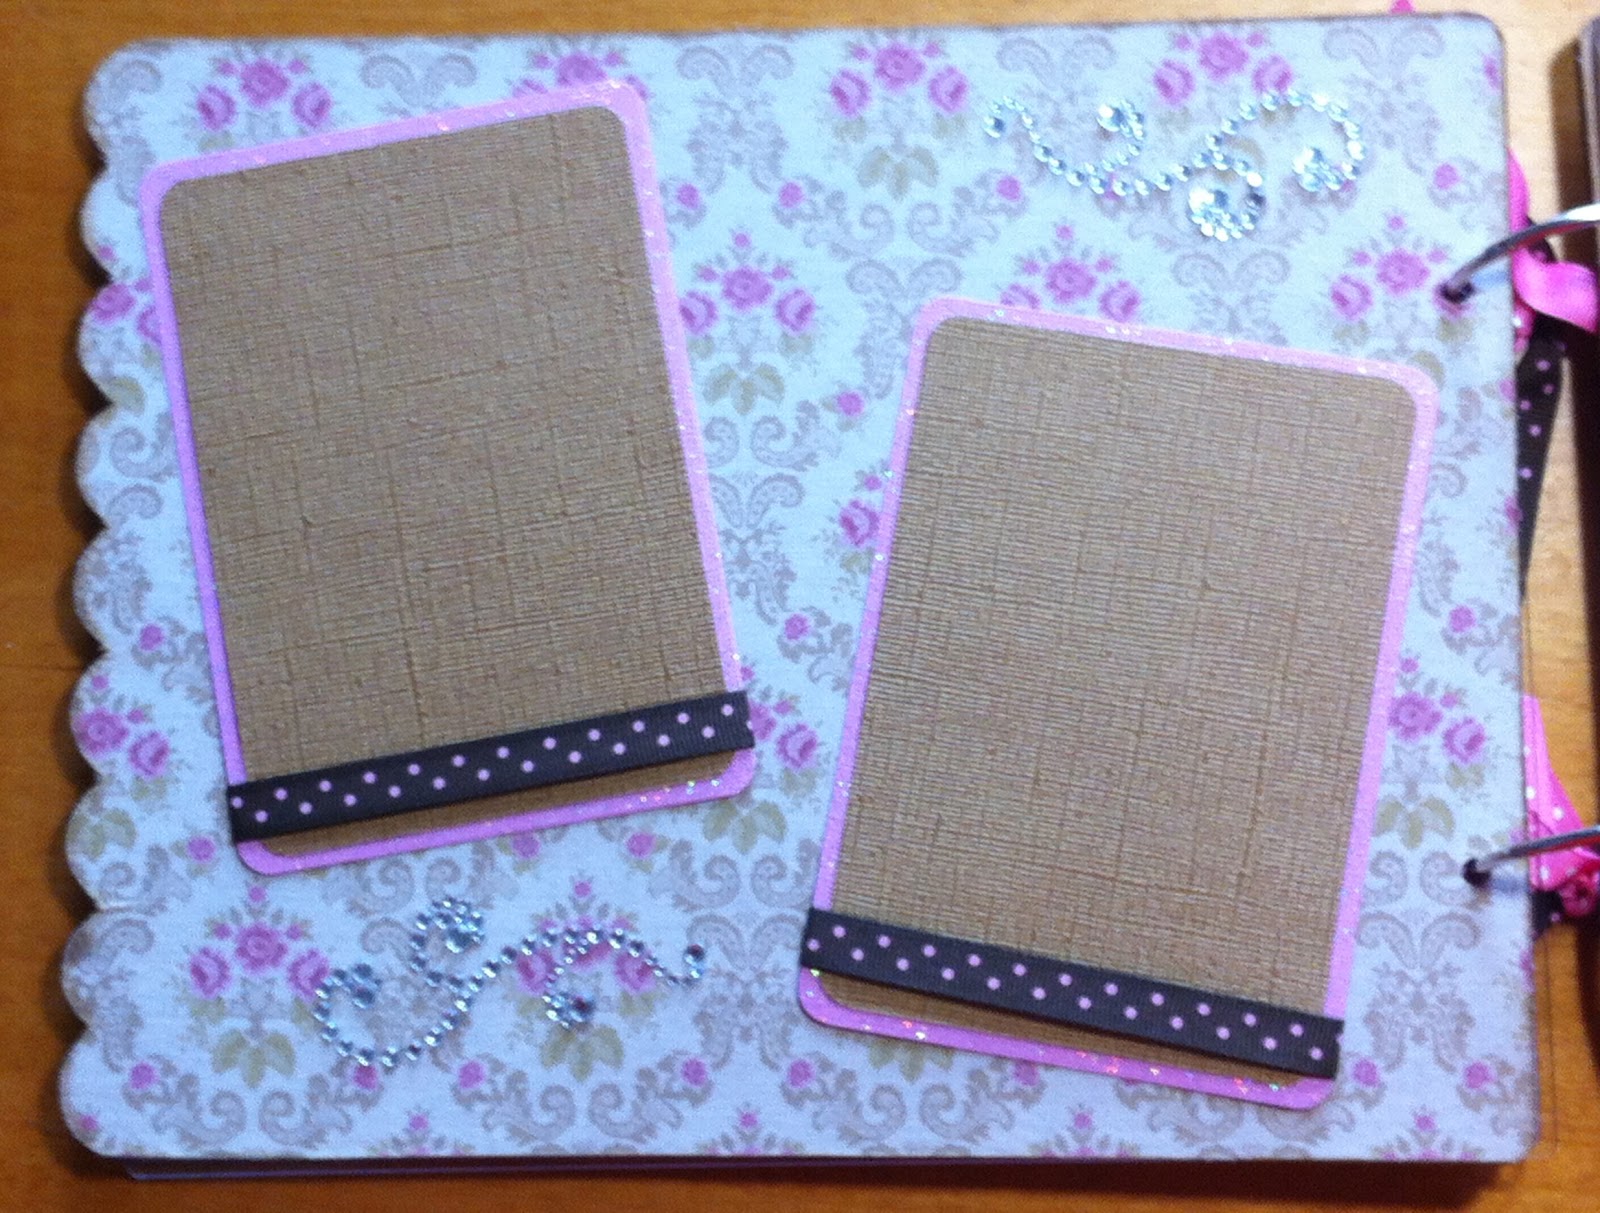
I like adding photo corners and ribbons to the photo mats.  That way, the person that gets the book can pop in photos right away.  The corners are from Paper Trimming cartirdge


This scroll border punch is latest favorite tool!  Its by EK Success and very difficult to find!


Used Martha Stewart border punch for this page.  


This will also be going into my Etsy Shop - Cat n Kat Kreations. My granddaughters like the book so much I will be making one for each of them.  WIth all the dances they performed this past season, the photos will certainly fill up a book this size!

Thanks for stopping by.  Have a great day and see you soon!

Koala-t hugs,

Cathy


Thursday, July 19, 2012

Fun With Chalk

Hi all!  When I first found the Chalkboard paper from DCWV at Michaels, I was intrigued.  I was always interested in markers and inks that show up on dark paper. I bought the DCWV chalkboard cardstock but once I had it, I wasn't quite sure how I wanted to use it.  I had come across various forms of "chalk" and I started to research them.  I purchased regular chalkboard chalk, Chalkmarkers and even a package of Crayola's Dry eraseboard crayons for dark surfaces.

I let my granddaughters try the regular chalk, but that proved to wipe off almost immediately.  Kayla made a birthday card for my son and worried the images would be gone before she got the chance to give it to him.  I didn't have any fixative sprays (my Mom, the artist, uses this often on her art work), so I sprayed it with hair spray.  That seemed to keep the artwork on the chalk board paper without smearing.  I knew that I did not want to do this every time I wanted to use chalks, I had to spray it with hairspray!

My next experiment was using the dry erase crayons from Crayola.  I liked these immediately, as the colors were bright and strong.  They went on smoothly onto the paper.  I am not much of a free hand artist, so I found a design in my Cricut handbooks (Storybook) and cut it at the largest size that would fit a 12 x 12 sheet.  I set the blade at 3, so that it would only score the top of the paper, not cutting all the way through.  More like etching the paper.  Its pretty cool because this paper does have a white core.   Then I took the crayons and drew along the etched lines.    Now, these crayons do rub off, not as easily as the regular chalk, but will come off with more vigorous rubbing.  After outlining the cut lines, I took a soft cloth and used it as a blender, softening the color and rubbing it into the paper.    Once blended into the paper, it didn't seem like it would rub off.  This has been in a bin for awhile with other papers and it did not rub off onto the other papers.  I was very happy with the results.


Here is another example of using the Crayons on the chalkboard paper. This was a more floral design I cut with the Cricut.   I didn't color the center of the design, as I will most likely cover it with photos.


This next one, I etched another design onto the brighter colored chalk board paper.  I did use a little white chalk, just to rub into the etching so the design stands out more.  The first photo is a close up, and the second one is of the full sheet.  Nice for a subtle design in the background.


This is a layout I did with the Chalkboard paper.  I did a design in the corners of the paper.  I used a silver gel pen.  It looks great on the black chalkboard paper.


This last one I cut out a design using the Cricut, and used the silver pen to draw a line following the shape of the design (its not an outline, so would it be called an "inline"???)


I really like this paper and hope to use more of it in cards and layouts.

Thanks for stopping by!

Koala-t hugs,

Cathy

Friday, July 13, 2012

Dance Themed Mini Book

Two of my granddaughters are very active in dance.  Both started before age 3 so I've already accumulated quite a few photos.  I've been working on books different style books that I display their photos.  I like the colors in this one (a bit busy, but colorful).  I told the girls they can choose the style they want and we can work on the books together.  

This one is in my Etsy shop (CatnKatKreations)

I used my Cricut Expression to cut chipboard, using Elegant Edges and the Book Special feature to cut the pages.  The paper is from the Paper Studio (Hobby Lobby's own line) stack called  So So Sweet.

I used Xyron 900 to adhere the cardstock to the chipboard.  Many of the shapes I used are from the Shall We Dance cartridge.

I used the Bind It All to bind the book and added lots of bling.

The book holds 12 - 4 x 6 photos, 2 wallet size and 2 5 x 7 photos.


I like to add pockets with tags to add more photos


Folders are another way to add more space for photos.  


Thanks for stopping by....have a great weekend.

Koala-t hugs,

Cathy

Monday, July 9, 2012

Wizard of Oz Mini Book

Happy Monday everyone!  Hoping you are enjoying the cooler temperatures!  I was nearly in shock when I opened my window Saturday afternoon to find the temperature had finally dropped.  It was actually cooler outside than it was in my apartment!!  Today is a bit warmer, but  enjoyable.

Today's feature is a mini book with Wizard of Oz themed paper by Graphic 45.  It was really a kit my daughter purchased from Archivers.

My granddaughters are very involved with dance.  One of the big production numbers this year was Wizard of Oz.  Both the girls were in this production.  Kerri played a scarecrow and Kerri (the 4 yr old) played Toto.  Both were adorable, but Kerri was a star as she stole the show with her cartwheel entrance and shaking her little Toto tail.

My daughter saw the kit and thought it would be a great gift for the girls' dance teacher.  Since Katie is quite busy with the girls, dance lessons, summer school, etc, I offered to make the book and all she had to do is add the photos!

Here are the pages of the book.  It measures 6 x 6 and has lots of fold out pages and pockets.


I really enjoyed making this book.  The paper is GORGEOUS!!!  I purchased the stack of the paper and hope to make one or two more....possibly one for my granddaughters with photos from their dance.

Oh, and I hope you don't mind, here's a photo of the Stars!....Kayla and Kerri!

Enjoy your Monday!

Koala-t hugs,

Cathy